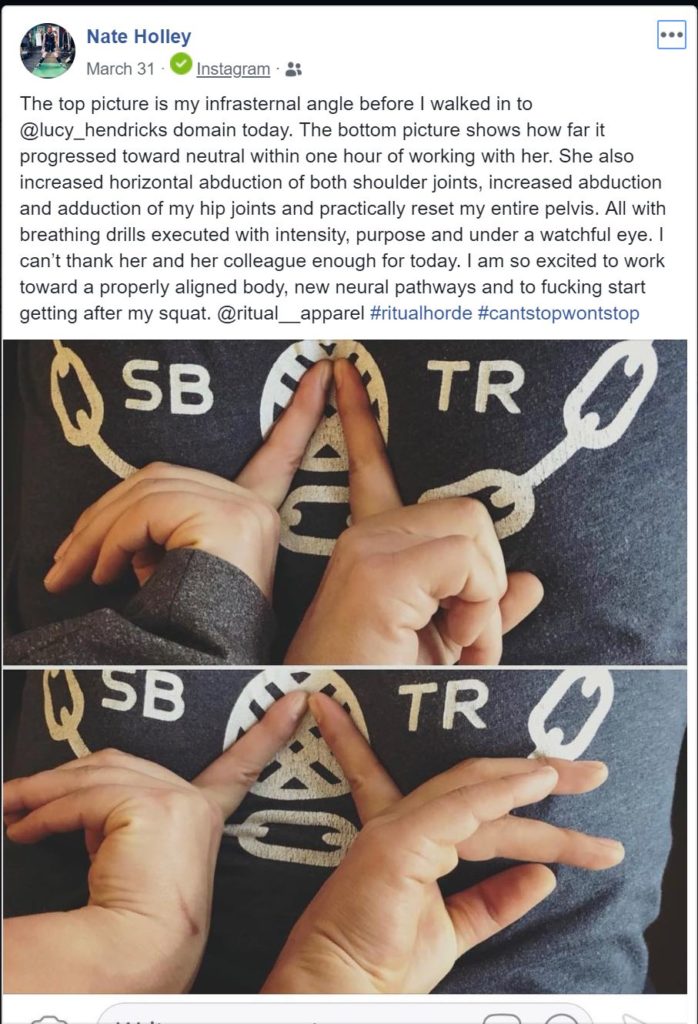
For this week’s post, it’s not technicality a social media post but it definitely has been said all over social media so that counts, right? I really wanted to highlight someone you should be following if you’re a personal trainer.
I mostly highlight coaches you should follow because they’ll make you better at coaching. Having all the knowledge and the skills that it takes to be great on the training floor is crucial. There’s no way around it, if you want to successful, you have to be a good coach, you have to do a good job.
But how will you let everyone know about it? How are the right people going to find you? And how are you going to set yourself apart?!
That’s what trainers suck at the most. They suck at marketing. They suck at selling. They suck at communicating and making their training meaningful for each client.
Think of all the missed opportunities because you were not good at back-end of things, or your ability to communicate with the right people.
That’s where Jon Goodman’s work comes in, because being a good coach is not enough to make it in this industry.
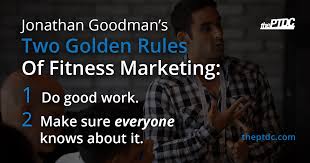
So for today’s social post, I wanted to highlight Jon’s two golden rules:
Get great results, and let everyone know about it.
Easier said than done.
Unless you find someone like Jon who shows you what to do.
I was introduced to his work during my first year as a trainer. My old employer, Molly Galbraith told me it’d be a good idea to follow his work, so I did 🙂
And I can honestly say if it weren’t for what I’ve learned through his work, you wouldn’t be reading my blog, I wouldn’t have had the privilege to continuously speak about what I’m passionate about, and I would probably be struggling right now as a personal trainer.
I believe in his work so much that I created a 48 hour class that is mostly based on his book, Ignite the Fire. I shove it down all my students throats because I want them to be successful. I want them to be introduced to content and his network right in the beginning from their career. I see it as a gift 😉
(In their head they’re probably like “OKAY, Lucy. We get it. we’ll follow people like Jon Goodman, Ben House, Pat Davidson, and Robb Wolf. We promise. You can stop telling us how awesome they are”)
So if you’re not following his work, what’re you waiting for?
Over the last year, my clients started progressing through their programming and entering the training floor at much faster rate than they were before. This change occurred because I’ve focused on coaching the basics savagely well.
I’ve learned how to coach people out of compensating during basic breathing exercises, which has resulted in better outcomes.
From a training standpoint, you want to see these exercises as activities that give your client’s access to motions that are needed on the training floor. Like hinging through the hips vs low back, squatting without the heels coming off the ground, or rowing without the shoulders gliding forward.
If you go the extra mile and get detailed with your coaching, I promise you, your clients will have substantially more positive outcomes.
Let’s talk about the three most common mistakes and then let me show you how to coach people out of them.
Exhaling too Hard
My goal with most breathing exercises is get the air out of the lungs. Because if air goes out, I know I got the ribs to move. If you’re exhaling too hard, you will contract muscles like external obliques, you’ll block the diaphragm from fully ascending (state of exhalation), and you’ll trap air in at the lower portion of the lungs.
Never underestimate the power of getting all the air out 🙂
Belly Breathing
I’ve been speaking about not belly breathing for a couple of years now and I’ve never had anyone at the end of the presentation disagree with me. Mostly because once people are presented with information, belly breathing no longer makes sense to them.
I always start out with these questions:
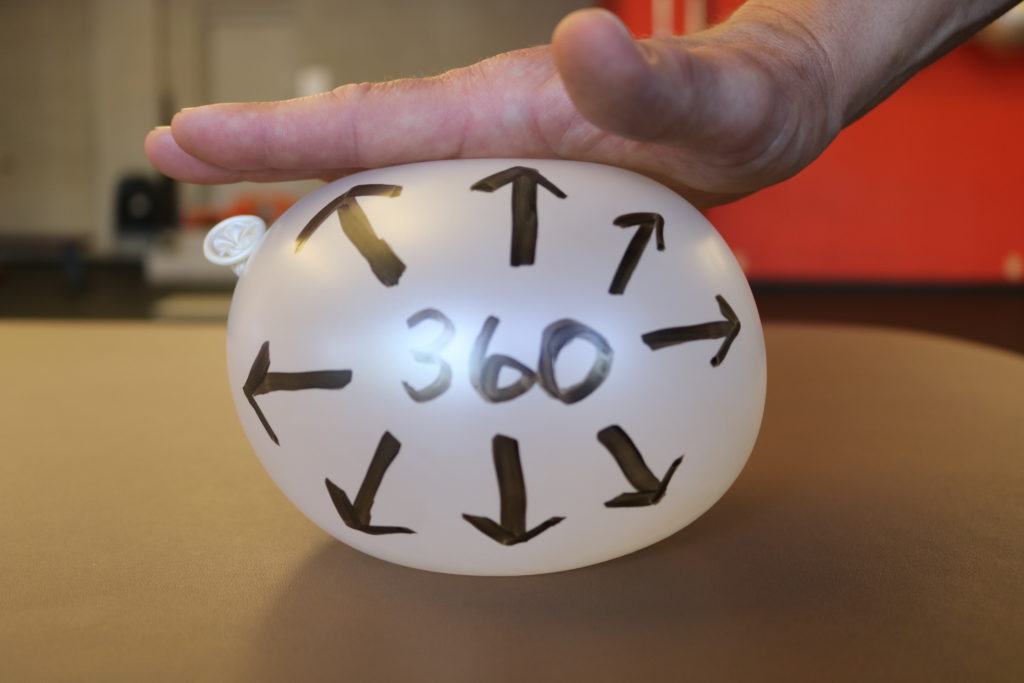
Do you agree that breathing should be 360? That breathing should expands the lungs and rib cage 360 degrees?
and 100% of the time people will answer “Yes” to those questions, which I follow up with.
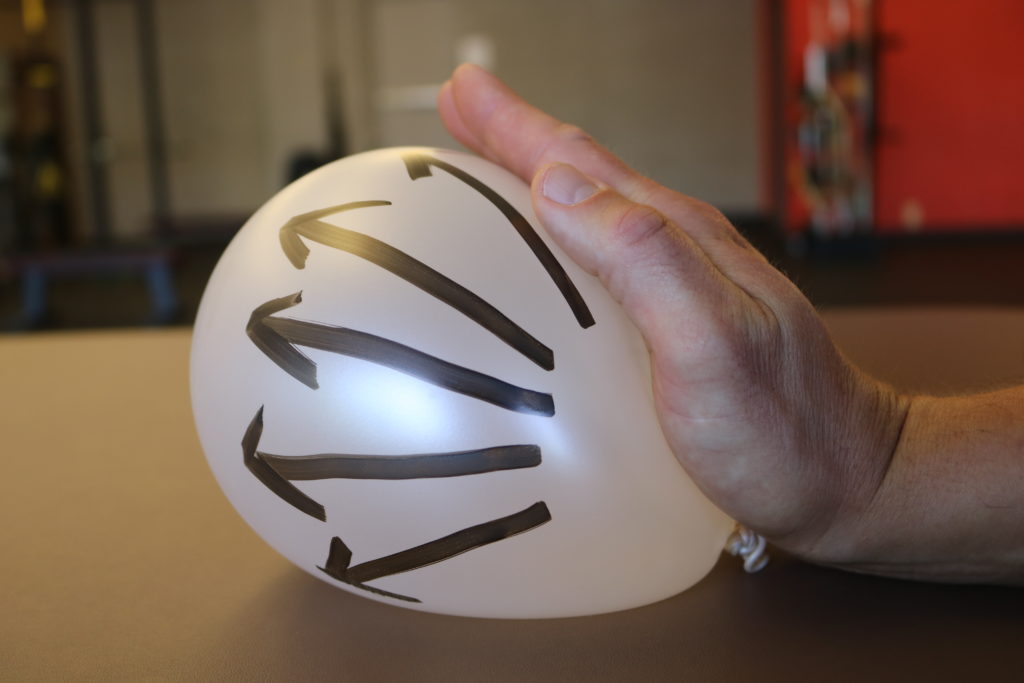
“Okay so we’re on the same page. Belly breathing doesn’t allow that to happen.” and I create a visual with my body to show them how belly breathing lacks the circumferential 360 degrees of expansion.
and usually that’s all it takes for people to leave belly breathing behind.
What I want:
What I don’t want:
During respiration, the ribcage and abdomen should expand a complete 360 degrees to achieve adequate intra-abdominal pressure. Belly breathing lacks this circumferential expansion which actually reduces intra-abdominal pressure.
If you want to coach someone how to breathing correctly, you must appreciate the rib cage and it’s resting state.
When you assess the rib cage, you can make some assumptions on what resting position their diaphragm is in. From the thousands of ribcages I’ve seen, people don’t struggle breathing in with their diaphragm, they actually struggle breathing out, letting their diaphragm to fully relax.
With most people, the diaphragm sits flat, in a position of inhalation.
Trying to achieve diaphragmatic breathing by cuing a belly breath would be like trying to open a an umbrella that is already open. An umbrella must be closed before in can be opened. In order for you to take a breath IN with your diaphragm, it needs to come from a state of being OUT (exhalation).
So stop coaching “billow the belly out”, “belly breathe”, or “let that hand on the belly expand” and start getting your clients breathing 360.
Crunching
This is one a big one. I see people online doing “breathing exercises” but they’re letting their clients crunch too much.
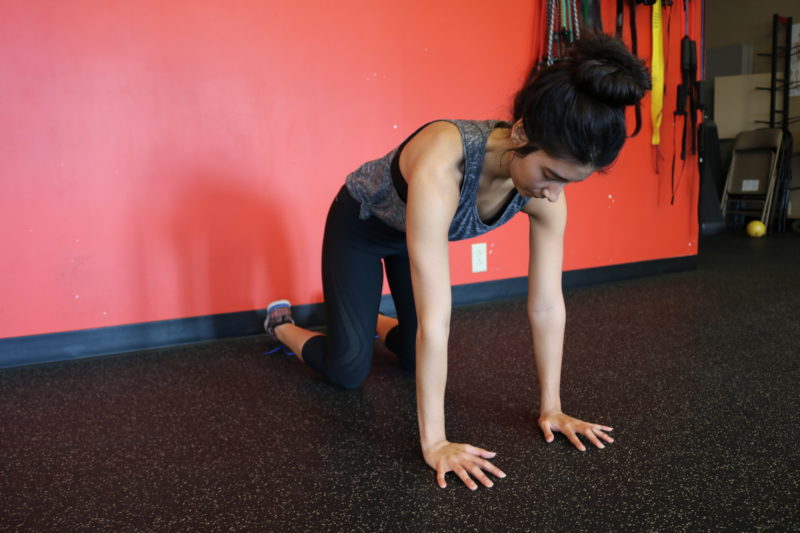
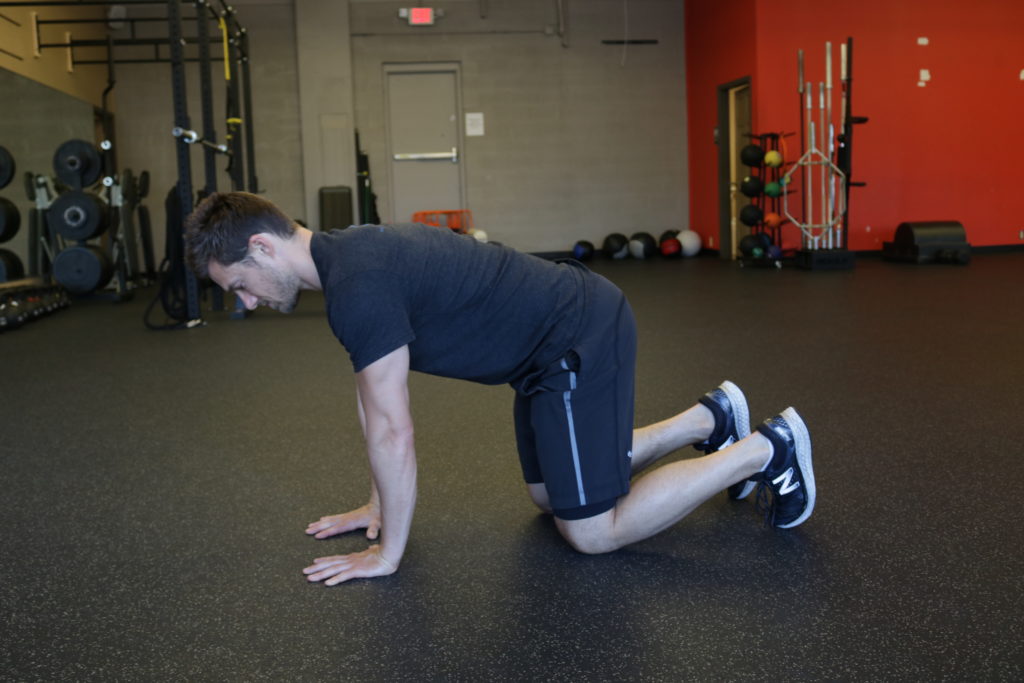
When someone is in quadruped, I want this:
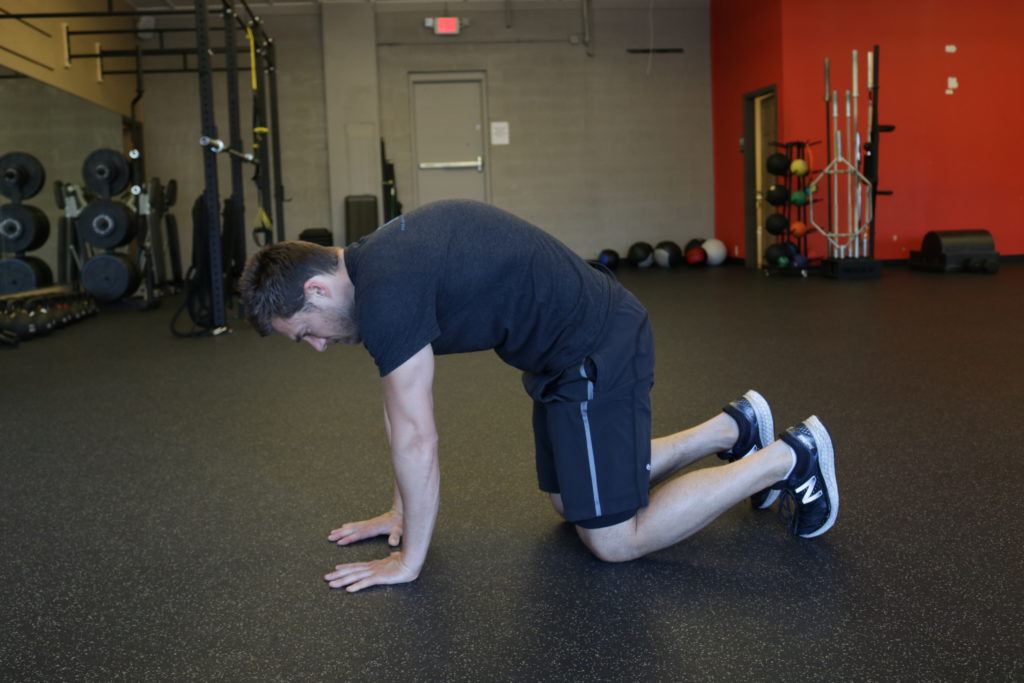
not this:
When you crunch and let your clients get all hunchy, you’re not achieving rib cage retraction, you’re getting sternal depression, and you’re overusing rectus.
If you’re chasing movement variability, you might not get the changes you want if you’re clients are rounding over.
With all that said, getting someone in a perfect quadruped position is a lot harder than most people think. If I have a pain-free client that just wants to lift, I will sometimes let that go and slowly coach them out of it every time they come in to train.
Detailed coaching doesn’t mean perfect, it means always improving 🙂
But if I have a post-rehab client that I’m trying to improve movement variability with, and I can’t get them doing this correctly, I will do other activities that will help them achieve what they want.
In the following video I’ll take you through how to coach clients out of three mistakes I just talked about andthree activities to try with those people you just can’t get them into quadruped.
Something to think about:
Like I said in the video, maybe your clients are not ready for quadruped. Try the activities I went over to set them up for success.
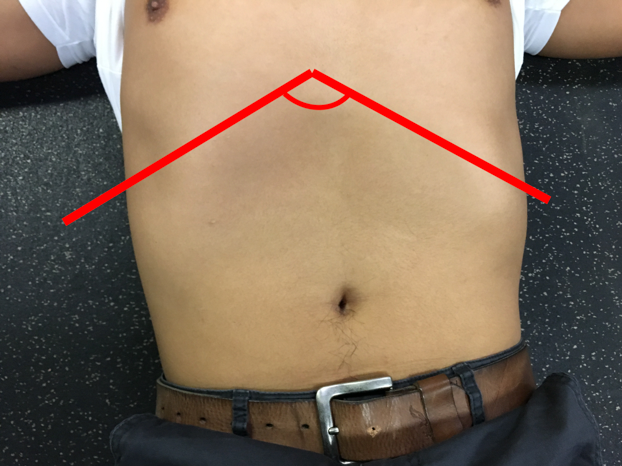
But you also might want to consider that quadruped and reaching forward might not be a good position for them. They might have a wide infrasternal angle (ISA). They might need a forceful exhale vs a soft prolonged sigh. They might need arms pulling over head vs reaching in front of them.
I don’t see many wide ISA people, but I do see them. To learn what to do with these people, check out my article on it. If you’re checking this and you’re thinking a lot of people are wide, you’re probably not checking right at the xyphoid process. Make sure you’re on-top of it, not below it. I messed up a lot when I first started checking it.
For this week’s post I’m going to highlight one of my facebook post from 2013. I’m going to show you the phases coaches go through when it comes to breathing. The first phase is called the “Belly Breathing Phase”.
It’s when the coach first gets into breathing, and they think that belly breathing is the way to go. Because the diaphragm is on top of the belly, so it makes sense to get people to belly breathe, right?
I clearly thought that’s how you got people to truly breathe through their diaphragm.
EVERYONE cues people to breathe through their belly…therapists, functional med docs, yoga and pilates instructors, massage therapists, and other coaches.
And that is because everyone only goes through the first phase of getting into breathing.
The first phase is when you realize breathing is pretty important. You start to appreciate how diaphragmatic breathing could help someone de-stress and move better, so you just start cuing belly breathing, because that’s what everyone else is doing.
If you stay on the first phase of learning about breathing, you don’t learn start digging deeper, you don’t look at the literature, you don’t take courses on it, and you just leave it at that.
It’s not until you get into the second phase that you realize, oh shit, breathing is more complicated than I thought. The body is more complicated than I once believed.
The second phase of breathing looks like this:
During respiration, the ribcage and abdomen should expand a complete 360 degrees to achieve adequate intra-abdominal pressure. Belly breathing lacks this circumferential expansion which actually reduces intra-abdominal pressure.
So when you’re doing activities like the ones bellow, notice how I don’t let my belly billow out as I breathe in. Think of keeping your front ribs down as you take a silent breath in. That will allow your ribcage to expand 360….which is the goal for a true diaphragmatic breath.
From my experience while assessing people, no one is struggling breathing IN with their diaphragm, they’re actually struggling breathing out, getting their diaphragm in a state of full exhalation.
Trying to achieve diaphragmatic breathing by cuing a belly breath would be like trying to open a an umbrella that is already open. An umbrella must be closed before in can be opened. In order for you to take a breath IN with your diaphragm, it needs to come from a state of being OUT (exhalation).
Practice the activities I shared above, and focus on getting a full exhalation.
I’ve always been one that’s quick to adapt to ideas, concepts, and practices that produce better results than what I was previously attaining. Letting go and moving on to better methods helps my clients achieve better results.
This is why one of our core values for our gym, Enhancing Life, is Progressive.
We created an environment that encourages change and innovation. New information and updated ideas will always be applied to better serve the needs of our clients and staff.
I’m progressive AF. I’m like the Bernie Sanders of the fitness industry. Why else do you think I wear glasses?
I’m okay with admitting I was once wrong, leaving things behind, trying new things, and letting my clients know that sometimes we stop doing certain things to better service them.
For example, one day I learned that better pelvic positioning during lifting could be attained by tucking the hips compared to my previous cue, squeezing the glutes. That following week, I never cued it again and taught my clients the difference between tucking and squeezing.
This willingness to change requires keeping your ego in check, which unfortunately, many coaches struggle with.
I thought that everyone who was presented with new information would be willing to admit that they were wrong and adapt the new information to improve client’s results.
Change for people is hard. People get emotionally attached to certain mentalities, methods, exercises, and philosophies. Then when confronted with conflicting beliefs, dogmatism and defensiveness takeover, and no progress is made.
It was very early on in my career that I gravitated towards the post rehab population. When I first joined the industry, I had mentors with a powerlifting background. When I asked where I could learn more about programing for the general population (with the post rehab people in mind), I was told to read 5-3-1.
However, 5-3-1 wasn’t helping me get my deconditioned post-rehab client who had never lifted more than 20lbs in their life move better and gain confidence in the gym. What did though, was breathwork.
With the immediate results I saw, I became obsessed. I wanted to know every breathing and biomechanical thing I could get my hands on. I ended up getting my massage license, took several continuing education courses, practiced daily what I learned, and imposed my will on people.
The deeper I got into it, the more I realized that movement is not so simple.
My exercise selection was constantly evolving. Cues and activities were always getting left behind when I found something that expedited results.
And around 3 years ago I ran into a huge problem. It wasn’t a simple, “hey we don’t squeeze anymore, let’s tuck the hips like this” kind of fix.
It was a paradigm shift in how I train client.
I was starting to question conventional industry wisdom: “row twice as many times as you press” or “pinch the shoulder back and down”, and those damn band pull aparts.
All things I was doing for years.
I started questioning how powerlifters “fixed” problems they saw on the training floor, such as adding extension to someone rounding over during a lift.
Or does the person losing upper back position during a deadlift really need to hammer more lat pulldowns and band pull aparts?
Or does the lifter who can’t get their elbows down on their back squat really need to open up their chest and pull their shoulder blades back?
And what got the biggest backlash: Would a competitive lifter get weaker if they got away from their extension-based exercises and chased some movement variability?
I was repeatedly told that if a powerlifter chased variability, they’d lose what “made them great” at their sport.
This belief had beginner powerlifters do the opposite of what I was trying to do with them because they were told they’d lose strength if they got away from extension based exercises.
Finally, in 2017, I was able to put my unconventional methods to the test.
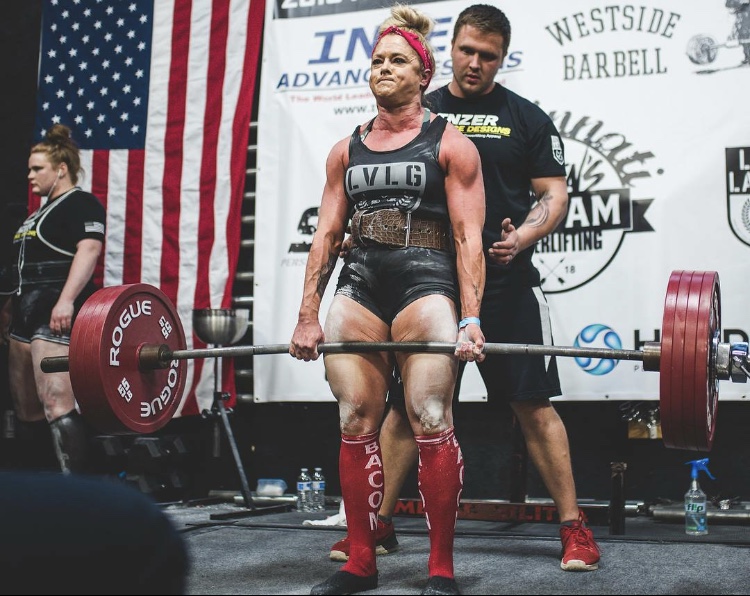
Tracy Jones, a world class powerlifter, was referred to me. She was barely able to walk without feeling discomfort, couldn’t sit in the car without feeling miserable, and didn’t have the mobility to squat below parallel without a massive weight shift and pain.
Limited variability isn’t a problem, until it’s a problem.
It’s a problem if it’s affecting your lifts. It’s a problem if you can’t hit certain depth in your squat. It’s a problem if your quality of life starts falling apart. It’s a problem if doctors are telling you that your done competing.
What “made her great” was about to finish her powerlifting career.
If you think you have the ability to take an athlete’s sagittal plane dominance away from them and make them weak, let me tell you, we’re not that good. No one is.
The 10-15 minutes a day Tracy spent chasing variability did not stop her from being an absolute monster on the training floor 4-5 times a week. What it did do was produce positive change in the way she moved, in a manner specifically targeted at her movement limitations.
The result? Hitting squat depth without pain, and staying in the game that she loves.
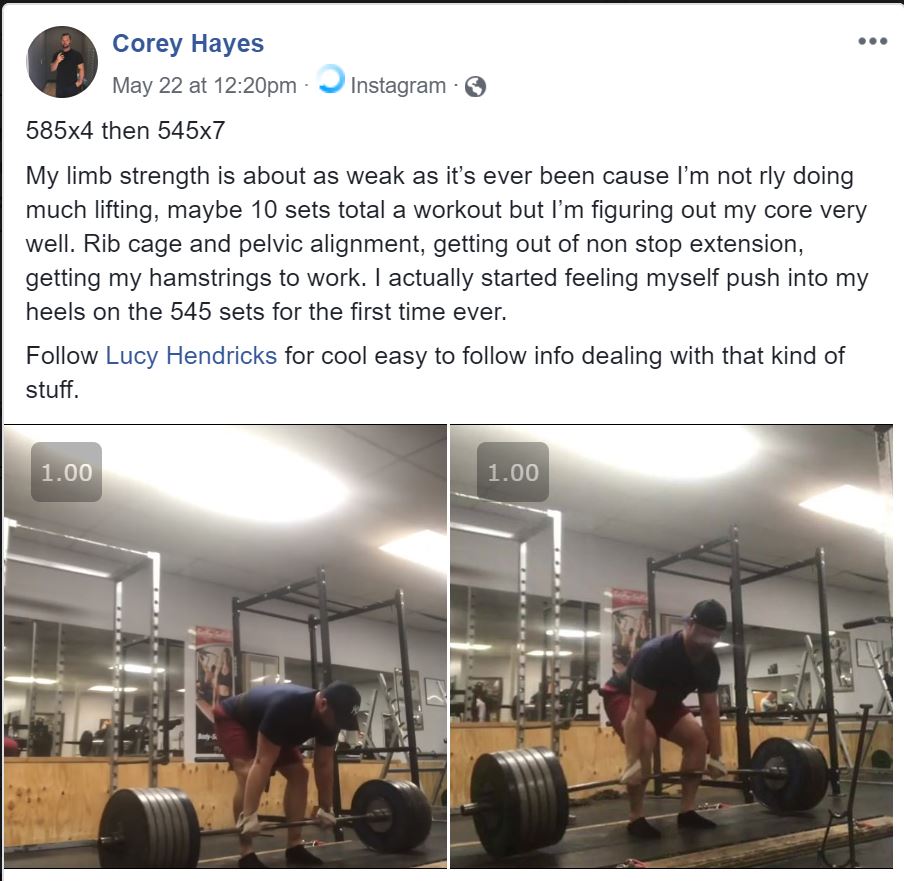
(These’s squats are about a year apart. On the first one Tracy has a pretty big shift as she tries to come up from the bottom. She was also not able to squat below parallel without a ton of pain. During the second video, she has less of a shift, comes up from the bottom without breaking down, and NO pain! )
Between Tracy Corey Hayes, and the other powerlifters I’ve worked with, I have yet to hear a single complaint about the better movement they’ve achieved.
So if you’re a powerlifter, train powerlifters, train the general population that lifts heavy, don’t be afraid to break away from extension-based exercises, don’t be afraid to do the opposite of what you’ve always done when it comes to “maintenance work”.
If you’re openminded in trying new things, let me get you started ?
Unfortunately, it’s not as simple as giving you one list of exercises. Everyone is different. I can’t just throw a blanket warm-up and tell you that is THE warm-up that every lifter needs.
What I gave Tracy Jones was different than what I gave Corey Hayes.
But that doesn’t mean I can’t guide you to the right direction or work with you to find out exactly what you need.
Here’s what we need to do.
STEP 1: ADDRESS DEFAULT RIBCAGE POSITION
The body is great at giving you illusions and as a coach, you can’t trust your eyes. As a lifter, you can’t trust what you feel. Muscles that feel extremely tight, might be the complete opposite, and blindly stretching it because of the way it feels, might cause more harm than good.
An example of not trusting your eyes would be rounding over during a deadlift. It may look like you’re lacking extension, but that probably isn’t the case. Below is an easy explanation that I take my students through when we talk about when I’m teaching them not to get fixated on the visual assessment.
Because I can’t trust my eyes to guide my client’s correctives, I use assessments like the infrasternal angle (ISA) and obers test to help me decided what do with each client. These tests can tell me the position of the pelvis and rib cage may be in.
Looking at the ISA helps me determine what kind of exercise to choose for each person, what kind of arm position will achieve better movement results, what positions may better drive change, and what breathing style will best address movement limitations.
By being guided by the ISA, I always end up getting changes throughout the body, such as shoulder mobility.
Or hip mobility, decreased tightness or discomfort.
So what angle do you or your client have?
Is it wide?
If so, you would like to start your warm-up with these types of activities
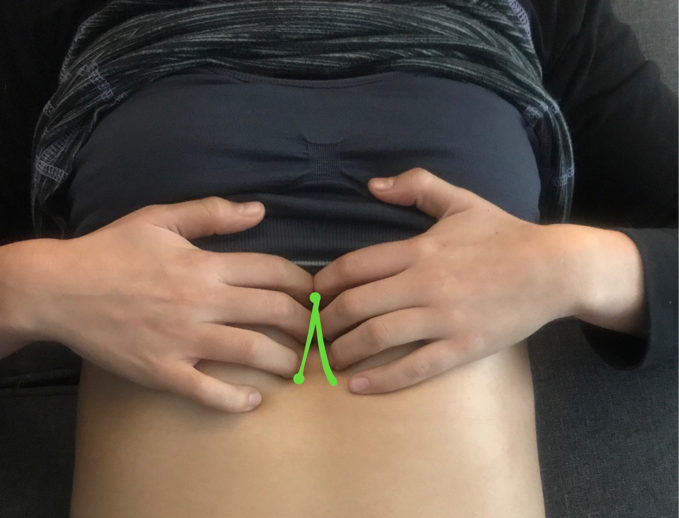
But what if it’s narrow?
Then I’d start with these warmup activities.
And if you’re not sure, you can work with me online and I can customize your warm-up so you’re not doing a bunch of mobility activities that don’t produce results.
If you’re interested in checking your client’s ISA, check out Zac’s video that is attached below, and my article where I go into more detail on why I use it as an assessment tool.
Once you have your 1-2 activities to get your started, let’s dive into other common activities that you might be doing that could be substituted for something more effective.
STEP 2: ADDRESS THE RIBCAGE’S RELATIONSHIP TO THE SHOULDER BLADES
A greater pull to push ratio was done to theoretically create a strong upper back, to “undo” all the benching in a program, and keep their shoulders healthy to stay in the game.
Sadly, this philosophy has a shaky foundation. Literally. Shoulder blades require a congruent foundation to sit upon to allow for effective movement. That foundation is the ribcage.
Look at the client’s ribcage as the door frame, and the door as the shoulder blades. For years I’d been trying to fix the door (shoulder blades), but this whole time the door frame (rib cage) was the one that needed work.
If a door frame is crooked, will you ever have a functioning door?
No.
Same with the shoulder blades. If the shoulder blades don’t have a rib cage to sit on, you might see some movement limitations and restrictions: anterior humeral glide, keeping the back together during lifts, issues with shoulder blade retraction, winging, hunched over back, limited shoulder flexion…..the list can go on and on.
Shoulder blades can move on a fixed rib cage, but don’t forget that a rib cage can move on fixed shoulder blades.
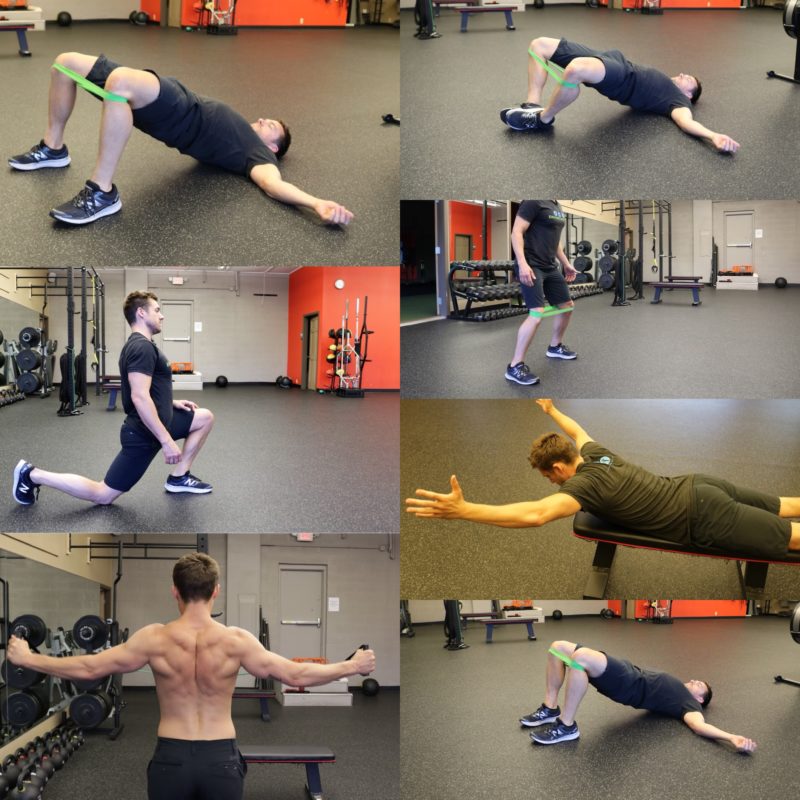
When I began to appreciate this movement, I got away from band pull aparts and Y T Is. Instead, I programmed reaching activities like rockback breathing, arm bars, reaching squats and quadruped work into my group classes. Even with my rudimentary understanding, I immediately noticed client’s movement quality, especially around the shoulders, improve in ways I never thought possible. I was sold!
Having a healthy relationship between the ribcage and shoulder blades gives all the muscle in that region better leverage to work. Better leverage means better mobility, strength, work load distribution, and less discomfort.
Try doing activities that work on the position of the rib cage instead of hammering a bunch of isolated scap work.
Rockback Breathing
Supine Arm Bar
Sidelying Band Reach
Reaching Squat
Still can’t break that pulling addiction? Try one arm pulls while keeping the opposite arm reaching. This movement places the rib cage in a better position for the shoulder blade to glide smoothly along. Say goodbye to winging, shrugging, pinching, and other compensations you may have experienced in the past.
Supine Band PNF
Half Kneeling Band PNF
For a more in-depth article on why pulling wont undo your benching, check out Justin Moore’s article “Why We Must Reach” and follow him on social media!
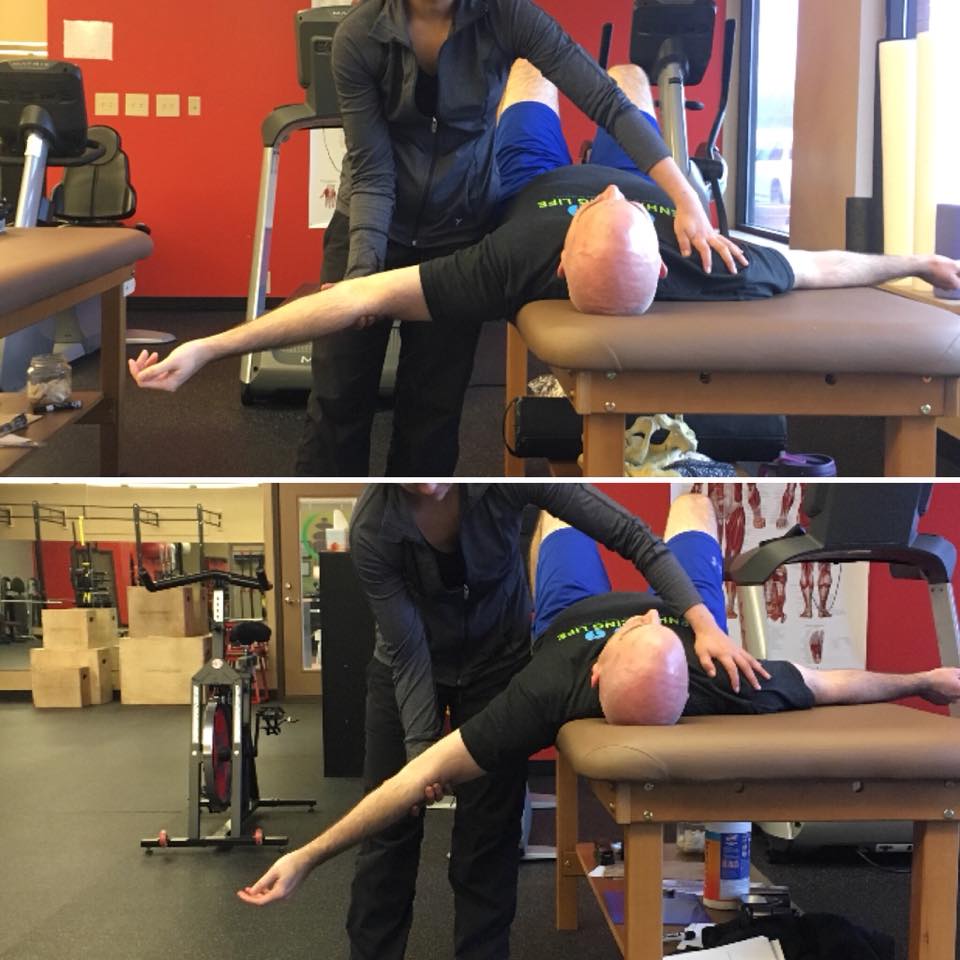
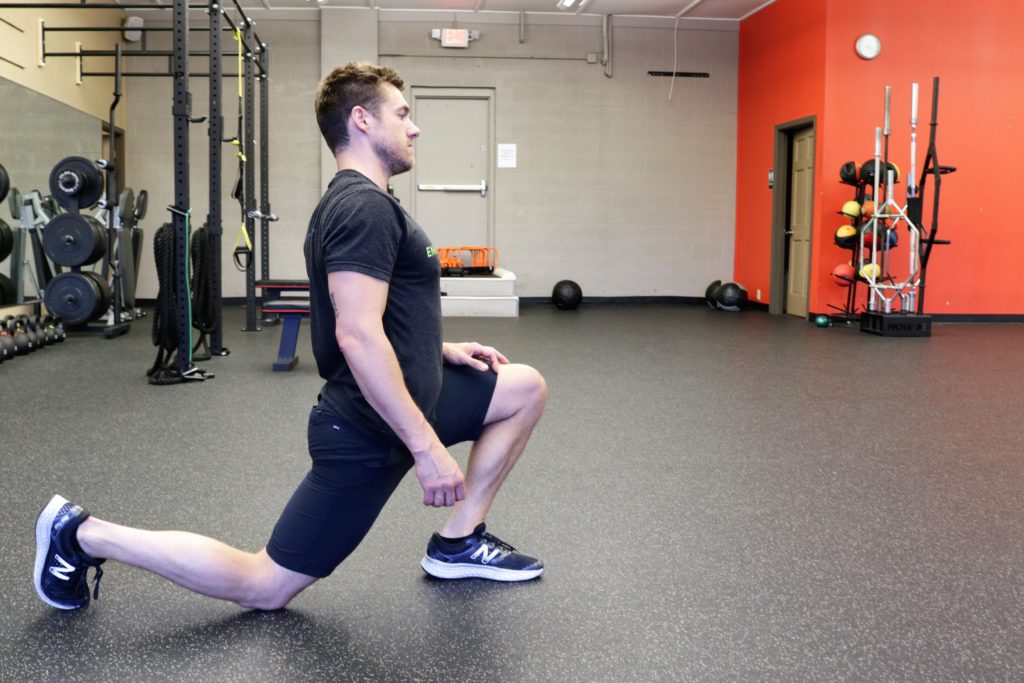
STEP 3: STOP STRETCHING HIP FLEXORS!
Conventionally, stretching hip flexors was thought to improve hip extension, but muscle lengthening is near impossible.
Unfortunately, this stretch doesn’t take into account pelvic position. In the above stretch, the pelvis remains in a flexed position, which leaves the hip flexors in a shortened position. What ends up being stretched are the anterior ligaments in front of the hip. <- Not good.
What to do instead?
Drive hip extension by getting hamstrings to pull the pelvis into a position of extension, which will result in lengthening of the muscles that you’re trying to stretch.
Before I share with you what to do instead, let’s go over the next exercise you can leave behind because they’ll have the same substitutes, might as well kill two birds with one stone ?
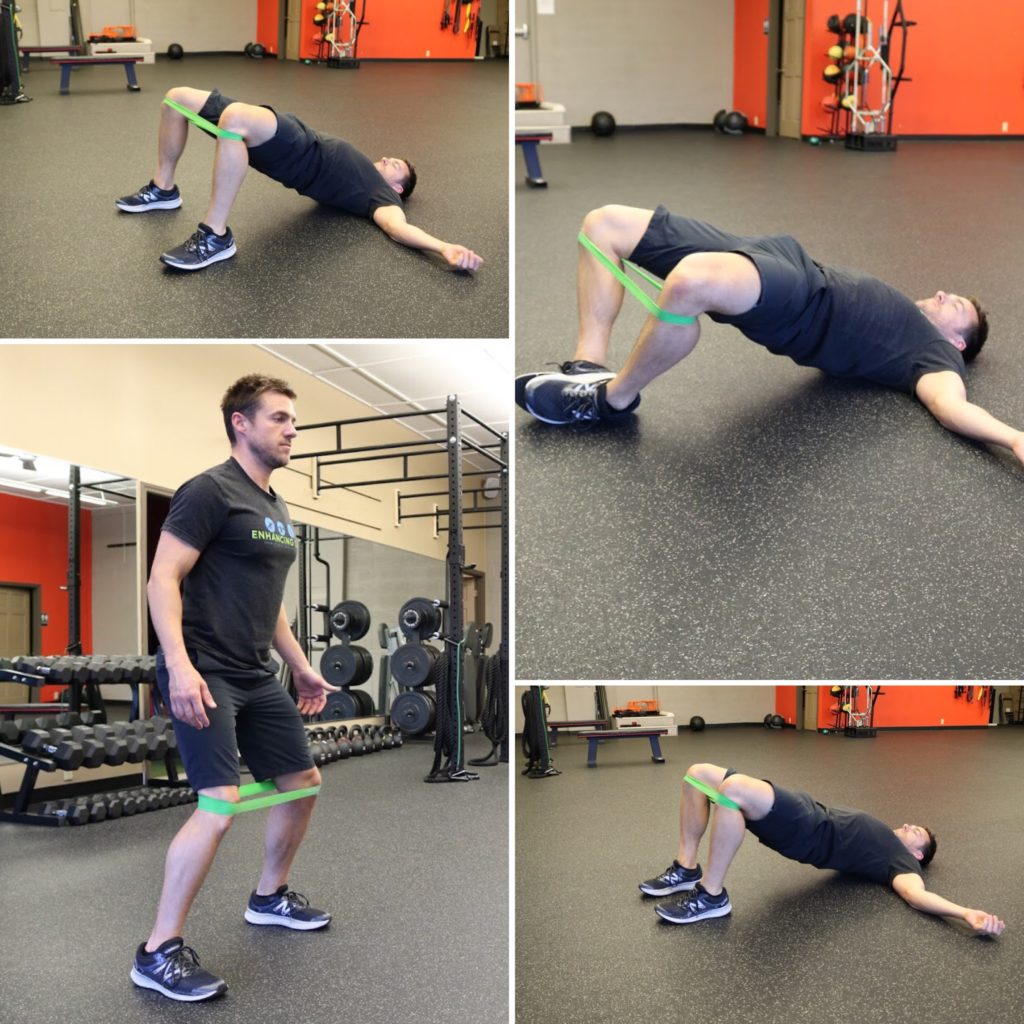
STEP 4: BURN THOSE BANDED GLUTE BRIDGES AND MONSTER WALKS
It’s not that these activities are causing you harm. It’s that your time is precious.
If you’re going to spend time doing any breathing/corrective/maintenance work at all, I’d rather you spend it on activities that may do a better job at making you move and perform better.
A lot of people do banded glute work because they’re trying to “activate” or “turn-on” their posterior chain. Even though getting the posterior chain to fire is important, you’re better off putting the pelvis in a better position that changes the length-tension relationship to those posterior chain muscles, allowing them to perform better. Just because you feel a muscle burn, doesn’t mean you’re making a positive impact on how that muscle will perform in other movements.
So instead of stretching the shit out of your anterior hip ligaments, doing 15 different banded glute bridges and multi directional band walks, do activities that alter the position of the pelvis. These movements will put less strain on the hip flexors, and put the glutes in a better position for them to work during your training session.
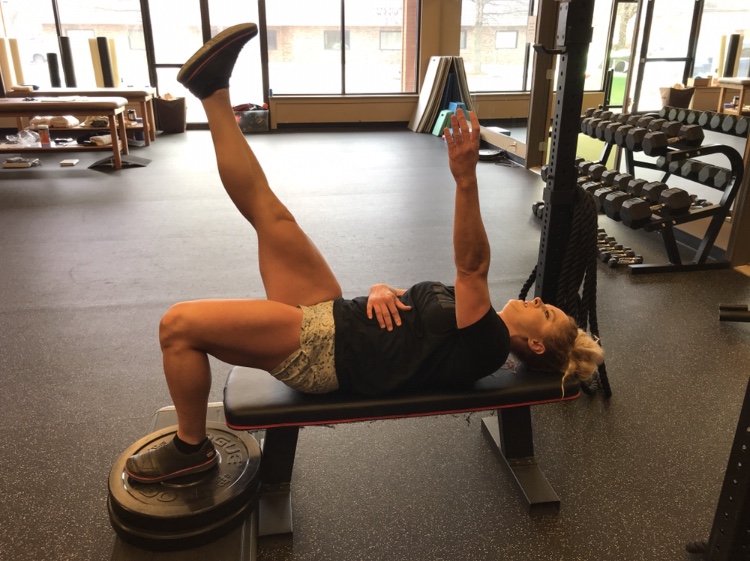
Supine Hip Extension Drill
Half Kneeling Breathing
Toe Touch to Squat
And then you can add a little intensity to these new positions. I would focus on the sagittal plane with the next few exercises. Really making sure your hips are tucked with some hamstrings, working on trying to keep your rib cage on top of your pelvis vs arching your back.
Glute Ham Raise Hold
Glute Ham Raise
KB Front Squat
Assisted Step Up
RFES
If you’re wanting to take this to the next level and start working on all three planes, which would be great during the off-season, I’d read Pat Davidson’s article, and check out this podcast where he goes over what a powerlifter should to do during the off-season.
After going through everything I wrote out for you, you should have a pretty badass warm-up.
You’ll start with your two activties you picked after figuring out your ISA. Those breathing activities clients will usually do 3 sets of each with 3-5 breaths each time.
From there you’ll move on to what we call “movement prep”. These activties are usually 3-6 exercises all done 1-2 sets of each with 3-5 breaths/reps.
This should only take 15 minutes to complete. At first when you’re first getting started, it might take a little longer, but once you know the exercises, you can get through them pretty quickly 🙂
On your days off you could go through your whole warm-up or just the first two with your ISA measurement.